16 Nov Windows Server Deployment
Our blog post for this month covers a topic that is not directly related to information security. Nevertheless, this topic should not be underestimated and neglected. It is about the automated installation of Windows Server in the enterprise. This might sound unspectacular, but we will cover some hidden stumbling blocks in this article.
There is a variety of tools available for the automated deployment of Windows in the enterprise addressing different scenarios:
-
- Microsoft provides the Windows Assessment and Deployment Kit (Windows ADK). The ADK includes several tools for automating Windows installations, such as the Configuration Designer, the System Image Manager or the Windows Preinstallation Environment (WinPE).
- Tool suites such as Microsoft Endpoint Configuration Manager, which can install Windows in an automated manner on large number of devices for end-users or servers in data centers. Endpoint Configuration Manager also leverages tools from the Windows ADK but makes them easier to use by hiding many details from the administrator and provides an infrastructure to enable deployment to thousands of endpoints without manual intervention.
- In virtualized on-premises data centers, products from virtualization vendors such as VMware vSphere or Microsoft Virtual Machine Manager are used to create virtual machine templates that can be used to deploy large numbers of VMs.
Windows should be installed as automated as possible—no matter if it is a device for an end-user or a server in the data center—with few manual activities. Automation leads to less effort when installing systems and to a reduction in misconfigurations, which always occur when many manual steps are performed. In addition, automated systems can be quickly reinstalled in the event of a failure, significantly reducing potential downtime.
Tier 0 environments following ESAE principles typically have a high level of virtualization. For this reason the third deployment option using VM templates often makes sense. We would like to limit the focus in this article to the creation of the sources and installation media. The deployment procedure being used depends on the specific deployment scenario. However, if you have any additional questions, please feel free to contact us 😊.
The basic principle is that a reference VM with Windows Server is installed, additional configurations are performed, such as enabling Credential Guard, and installing additional software such as virus scanners, monitoring and backup agents, or the Microsoft Local Administrator Password Solution (LAPS). Based on this reference VM, a template is then created, which is used to install the VMs in the environment.
The reference VM for the deployment template can be installed manually or in an automated fashion. When using a manual approach, all steps must be properly documented to be able to reproduce the steps when a new version of the template is created. With an automated installation, the initial effort is higher, but further changes are then easier and safer to implement.
Automating the Windows installation
There are basically several ways to customize a Windows image:
-
- Using online servicing, Windows is installed on a reference device. On this device, drivers, applications, and configuration adjustments are added and then the Windows installation is generalized using the Sysprep tool.
- Using offline servicing, the Windows image is copied from the installation medium and mounted in a temporary directory using the DISM tool. Changes such as additional drivers, updates, applications, and configuration changes are injected into this temporary directory and then written back to the image.
Regardless of the chosen method, the image can then be installed on any number of systems.
Offline servicing has the disadvantage that in case a new version of the image is created, the steps to modify the image must be repeated manually. With online servicing, when a new version of the operating system is released, the additional files can be added to the new installation medium and then a new image version can be created. This method will be briefly described here.
Creating an Autounattend.xml
The required input while installing Windows, such as the selection of the operating system edition or language and keyboard layout can be suppressed using an answer file. The Windows setup program uses the settings stored in this file and installs Windows automatically and does not display any input dialogs.
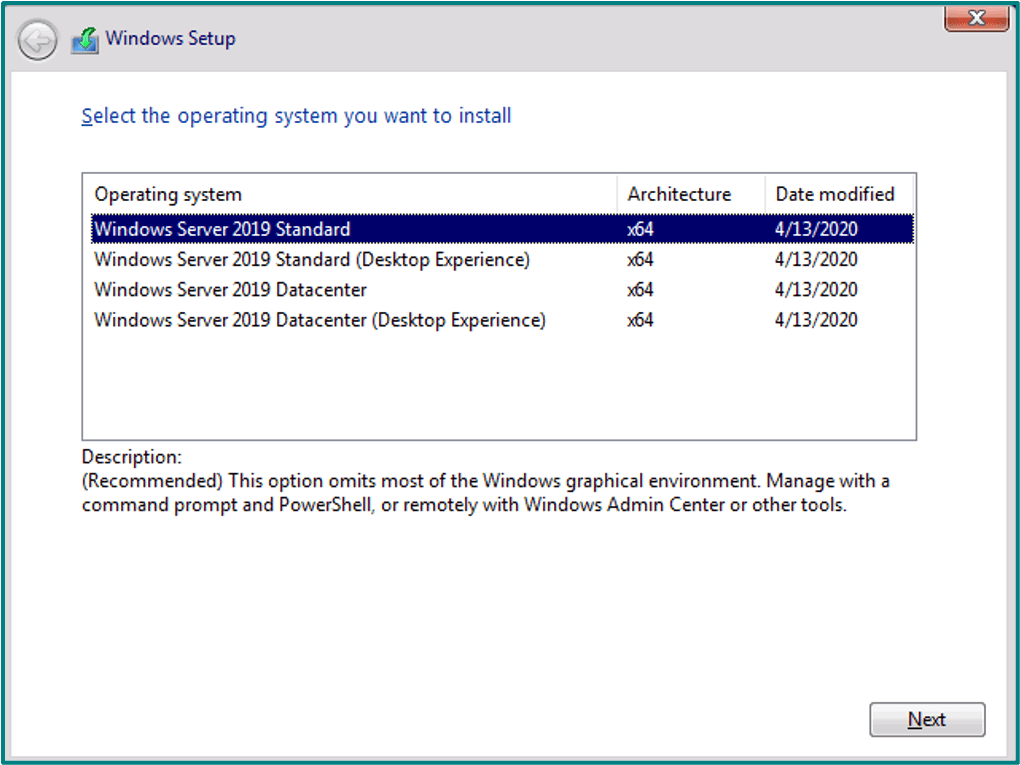
The Windows ADK contains the Windows System Image Manager (Windows SIM) tool designed to create and customize answer files. This graphical tool can be used to adjust the settings for Windows Setup.

The result of the adjustments in Windows SIM is an answer file in XML format. Below you can find an abbreviated excerpt from an example answer file for illustrative purposes.
<?xml version=”1.0″ encoding=”utf-8″?>
<unattend xmlns=”urn:schemas-microsoft-com:unattend”>
<settings pass=”windowsPE”>
<component name=”Microsoft-Windows-International-Core-WinPE” processorArchitecture=”amd64″ publicKeyToken=”31bf3856ad364e35″ language=”neutral” versionScope=”nonSxS” xmlns:wcm=”http://schemas.microsoft.com/WMIConfig/2002/State” xmlns:xsi=”http://www.w3.org/2001/XMLSchema-instance”>
<InputLocale>en-US;de-DE </InputLocale>
<SystemLocale>en-US</SystemLocale>
<UserLocale>en-US</UserLocale>
<UILanguage>en-US</UILanguage>
</component>
[…]
The settings for the answer file are documented in the Unattended Windows Setup Reference.
The contents of the installation medium are copied to a so-called build directory. The answer file is stored in the root of the build directory with the name Autounattend.xml. Windows Setup looks for a file with this name in the root directory of the installation medium and then uses it.
Adding boot-critical drivers
Windows includes the so-called driver store. The driver store contains driver packages that are stored in the directory %SystemRoot%\System32\DriverStore. During installation, Windows uses the hardware IDs of the connected devices and searches the driver store (and possibly Windows Update and additional locations) for matching driver packages and installs them.
Boot-critical drivers are required to be installed and loaded for a Windows installation to succeed. These are especially drivers for I/O controllers, which control the access to the hard disk. Without a loaded driver Windows cannot access the hard disk and the Windows installation will fail.
Drivers that are not included in the Windows driver store must be added to the build directory. An additional directory for drivers is created in the build directory and this directory will be referenced in the Autounattend.xml. The drivers in this directory and its sub-directories are installed by the Windows setup program.
A common example where a boot-critical driver is needed is with VMware VMs that use the VMware Paravirtual SCSI controller. The necessary drivers are not included with Windows and are copied from the VMware Tools ISO to the .\drivers directory.

The path is referenced in the autounattend.xml answer file. It should be noted that the drive letter D: will be assigned to the installation medium when the Windows setup program is started.
<component name=”Microsoft-Windows-PnpCustomizationsWinPE” processorArchitecture=”amd64″ publicKeyToken=”31bf3856ad364e35″ language=”neutral” versionScope=”nonSxS” xmlns:wcm=”http://schemas.microsoft.com/WMIConfig/2002/State” xmlns:xsi=”http://www.w3.org/2001/XMLSchema-instance”>
<DriverPaths>
<PathAndCredentials wcm:keyValue=”6b86e64″ wcm:action=”add”>
<Path>D:\drivers</Path>
</PathAndCredentials>
</DriverPaths>
</component>
Adding Scripts and Applications
Since the first Windows NT versions, Windows has the capability to add files to the installation. A subdirectory named $OEM$ is created in the .\sources directory. In this directory are additional subdirectories with a fixed meaning.
|
$OEM$ |
Contains additional directories and files for automated or custom installation. |
|
$OEM$\$$ |
Files and subdirectories are copied to %SystemRoot%. |
|
$OEM$\$1 |
Represents the drive where Windows is installed. Files and subdirectories are copied to %SystemDrive%. |
There are several ways to automatically start custom scripts and programs during or after Windows setup. One of them is to add a SetupComplete.cmd file to the directory %SystemRoot%\Setup\Scripts. This batch file will be executed automatically at the end of the setup. It must be copied to .\sources\$OEM$\$\Setup\Scripts in the build directory.
A directory structure underneath $OEM$ can look like this:
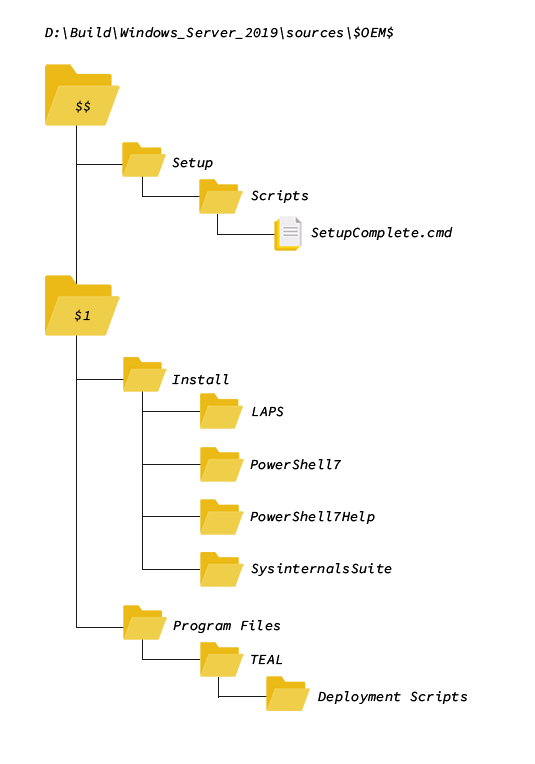
In the batch file SetupComplete.cmd applications can then be installed, or further scripts can be executed. In this example, the referenced files are copied to the directory C:\Install by the Windows setup program. This directory can then be deleted with a script at the end of the installation.
Creating an installation media
Once the installation files and scripts are added to the build directory, the installation media can be created.
USB installation media
For physical hardware that is easily accessible, an USB stick with the Windows installation files be used. The USB stick must be formatted with the FAT32 file system, and the contents of the build directory simply copied to the USB stick.
ISO installation media
For physical hardware located in a remote data center and for VMs, an ISO installation media is used. Server hardware often comes with management solutions such as HP Integrated Lights-Out (ILO) that allows mounting an ISO file to a physical server.
The Oscdimg tool that is included in the deployment tools part of the Windows ADK creates the ISO installation media,. If the build directory is for instance D:\Build\Windows_Server_2019, the following command creates an ISO file D:\Images\Windows_Server_2019_Custom.iso:
.\oscdimg.exe -m -o -u2 -udfver102 -bootdata:2#p0,e,bD:\Build\Windows_Server_2019\boot\etfsboot.com#pEF,e,b
D:\Build\Windows_Server_2019\efi\microsoft\boot\efisys.bin D:\Build\Windows_Server_2019 D:\Images\Windows_Server_2019_Custom.iso
When using vSphere, the reference VM can be copied to template after Windows has been installed. VMs can now be deployed using this template, that can customize Windows by running Sysprep, changing the computer name, or performing a domain join.
Updating the installation media for new Windows versions
If the installation medium must be updated for a new Windows version, such as Windows Server 2022, a new build directory is created, and the following files and directories are copied over to the new build directory.
| .\Autounattend.xml |
| .\drivers |
| .\sources\$OEM$ |
If no further adjustments are necessary, for instance caused by updated settings in answer file of the new Windows version, the installation medium can be created again as described above and the adaption of the automated installation to the new Windows version is already done.
Conclusion
The article describes the basic steps for automating a Windows installation, which can be used for ESAE Tier 0 environments without the need of a tool suite such as Endpoint Configuration Manager that can serve as the basis for a largely automated creation of vSphere templates, and we hope this is helpful for everyday work.
Sieh dir diesen Beitrag auf Instagram an
Sieh dir diesen Beitrag auf Instagram an
LATEST POSTS
-

Behind the scenes of our security assessment
Today we want to take a look behind the scenes of our security assessment, but what is it anyway? In a nutshell, we enable you to make informed decisions and base your next steps on a solid, risk-aware foundation....
15 April, 2024 -
Pwned by the Mail Carrier
How MS Exchange on-premises compromises Active Directory and what organizations can do to prevent that. SpecterOps recommends their customers establish a security boundary around their most critical assets (i.e., Tier Zero) of Active Directory (AD). ...
04 April, 2024 -
secIT 2024: Focus on system hardening
Together with one of our partners FB Pro, we will be at stand 58 in the Eilenriedehalle in the Hannover Congress Centrum. Our focus will be on a central topic that is of crucial importance in the cyber security world: system hardening...
15 February, 2024